Calibration
- Dimensional Calibration
- Electronic Calibration
- Field Service Calibration
- Fiber Optic Calibration
- Hand Tool Repair
- Hard Gage Calibration
- Life Sciences Calibration
- Pressure Calibration
- Vacuum Calibration
- RF Electronics Calibration
- Temperature Calibration
- Humidity Calibration
- Torque Calibration
- Mass Calibration
- ON SITE FIELD SERVICES
- Gage Calibration FAQs
- WESTport ISO Accreditations
- Useful Resources
Hard Gage Calibration
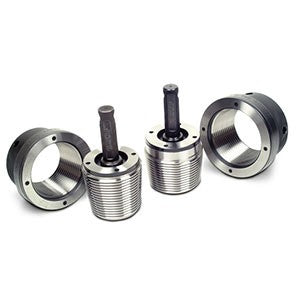
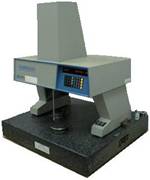
FVM and Twin Pines Metrology, divisions of WESTport Corporation use state of the art equipment to ensure the highest degree of measurement uncertainty. With this equipment, and our custom-designed software, we are able to offer you the best possible turnaround time, and pricing in the industry. The hard gage calibration lab is held at 68°F with relative humidity not to exceed 45%. Both temperature and humidity are closely monitored by our Honeywell environmental control unit. We also have a suspended floor to help avoid unnecessary vibration and ensure a good measurement uncertainty of all of our equipment.
When your gages come into our ISO/IEC 17025 accredited hard gage lab, they have already been thoroughly cleaned and inspected for shipping damage. Gages sit in the lab for 24 hours in order to acclimate to the proper laboratory conditions. When the gages are calibrated, they are also closely inspected for nicks, burrs, and corrosion; then re-cleaned and stickered. When packaged for return, gages are either coated in dip-seal, or oiled and wrapped in bubble wrap, and boxed securely. Calibration pricing includes cleaning, and level 4 certification. Average turnaround time is 1-3 days.
| Hard Gage Calibration and Repair | |||
|---|---|---|---|
| Angle Blocks | Gage Blocks | Pitch Mic Masters | Stage Micrometers |
| Angle Plates | Gear Wires | Pin Gages | Steel Rules |
| Combination Squares | Kalmasters | Protractors | Tape Measures |
| Concentricity Gages | Length Standards | Radius Gages | Taper Gages (Rings & Plugs) |
| Cylindrical Plugs & Rings | Levels | Reference Specimen | Tapered Thread Gages |
| Cylindrical Squares | Masterdiscs | Screw Pitch Gages | Tri Roll Gages |
| Deltronic Plugs | Mikemasters | Sine Bars | Thread Plugs & Set Plugs |
| Depth Master (Leitech) | Optical Flats | Spline Plugs & Rings | Thread & Setting Plugs |
| Depth Mikemaster | Parallels | Squares | Thread Rings & Wires |
| Feeler Gages | Pi Tapes | Straight Edges | V Blocks |
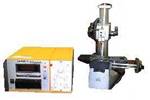
Operation is at once simple, sophisticated and secure. The instrument is configured by an easy-to-use set-up menu. The user selects the proper settings for the cutoff, stroke length, standard 2RC and Gaussian filters (Rk filter optional), parameter functions, serial port and plotter operation. Set the exact stroke length required or use the standard 5-cutoffs. After setting, the programming can be secured by a turn of the lockout key, which prevents inadvertent changes. Once configured, the system operates by pressing the Start Button or through use of an optional remote start switch.The Series 400 Amplifier is a sophisticated yet easy to use instrument with a modular surface texture program. All models feature a vacuum fluorescent display and sealed membrane keypad. An RS-232 communication port is standard (RS-485 optional), along with a remote start switch port and lockout key switch. Battery power is included on all models with the graphic plotter, and is optional on all other models.
Operation is at once simple, sophisticated and secure. The instrument is configured by an easy-to-use set-up menu. The user selects the proper settings for the cutoff, stroke length, standard 2RC and Gaussian filters (Rk filter optional), parameter functions, serial port and plotter operation. Set the exact stroke length required or use the standard 5-cutoffs. After setting, the programming can be secured by a turn of the lockout key, which prevents inadvertent changes. Once configured, the system operates by pressing the Start Button or through use of an optional remote start switch.
The Series 400 Amplifier is a sophisticated yet easy to use instrument with a modular surface texture program. All models feature a vacuum fluorescent display and sealed membrane keypad. An RS-232 communication port is standard (RS-485 optional), along with a remote start switch port and lockout key switch. Battery power is included on all models with the graphic plotter, and is optional on all other models.
The Skid-Reference Piloter
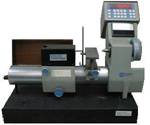
Skid-referenced systems are designed to measure normal I.D., O.D., and flat surfaces. The skid-referenced motor drive (piloter) contains a motor which moves the linkarm with the tracer across the surface to be sampled. The tracers have skid pads which establish a reference line. The transducer translates the vertical motion of the diamond tip stylus in relation to the reference line. The piloter traverses at a speed of 0.1 in/sec (2.54 mm/sec) for the travel length specified and can be set to acquire data in either direction. Our patented Lite-Touch Linkarm protects the tracer and surface from inadvertent damage and comes standard with each system, unless otherwise specified.
The Series 400 Amplifier is a sophisticated yet easy to use instrument with a modular surface texture program. All models feature a vacuum fluorescent display and sealed membrane keypad. An RS-232 communication port is standard (RS-485 optional), along with a remote start switch port and lockout key switch. Battery power is included on all models with the graphic plotter, and is optional on all other models.
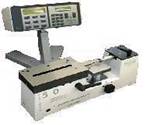
ULM Opal 600 Universal Linear Measurement Machine is used to measure cylindrical rings, non-standard thread rings, length standards and gage blocks up to 24". The Opal features computer assisted temperature correction.

Calibration
- Dimensional Calibration
- Electronic Calibration
- Field Service Calibration
- Fiber Optic Calibration
- Hand Tool Repair
- Hard Gage Calibration
- Life Sciences Calibration
- Pressure Calibration
- Vacuum Calibration
- RF Electronics Calibration
- Temperature Calibration
- Humidity Calibration
- Torque Calibration
- Mass Calibration
- ON SITE FIELD SERVICES
- Gage Calibration FAQs
- WESTport ISO Accreditations
- Useful Resources


